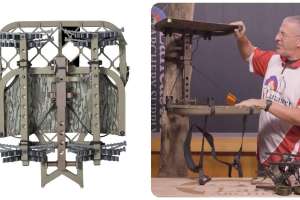
It was years ago. I’d been trying to get the furnace on the family camper to ignite with zero success. Frustrated and miserable, I punched the side of the camper and stormed off. That’s when my buddy said, “Don’t get mad, bro. Just YouTube it.”
I rolled my eyes in disgust. Then I sat down in my camp chair, pulled up a few videos, and went to Jayco furnace school. An hour later, after watching multiple trouble-shooting tutorials, the propane sparked, and the heater kicked on. Viola.
I know the platform can be annoying. My youngest son, Brody, is addicted to watching other kids play video games on it. I don’t get it. With that noted, it can be your best ally when it comes to tuning a bow or helping a wanting-to-learn-a-few-quick-tricks client. Looking for more paper-tune ideas? Start watching. What about timing that just-dropped-at-the-shop fall-away? Pick from one of a thousand videos. Adjusting draw length, discovering the perfect anchor, building a four-fletch arrow, changing out limbs, tying in a peep, setting nocking points . . . it’s all there.
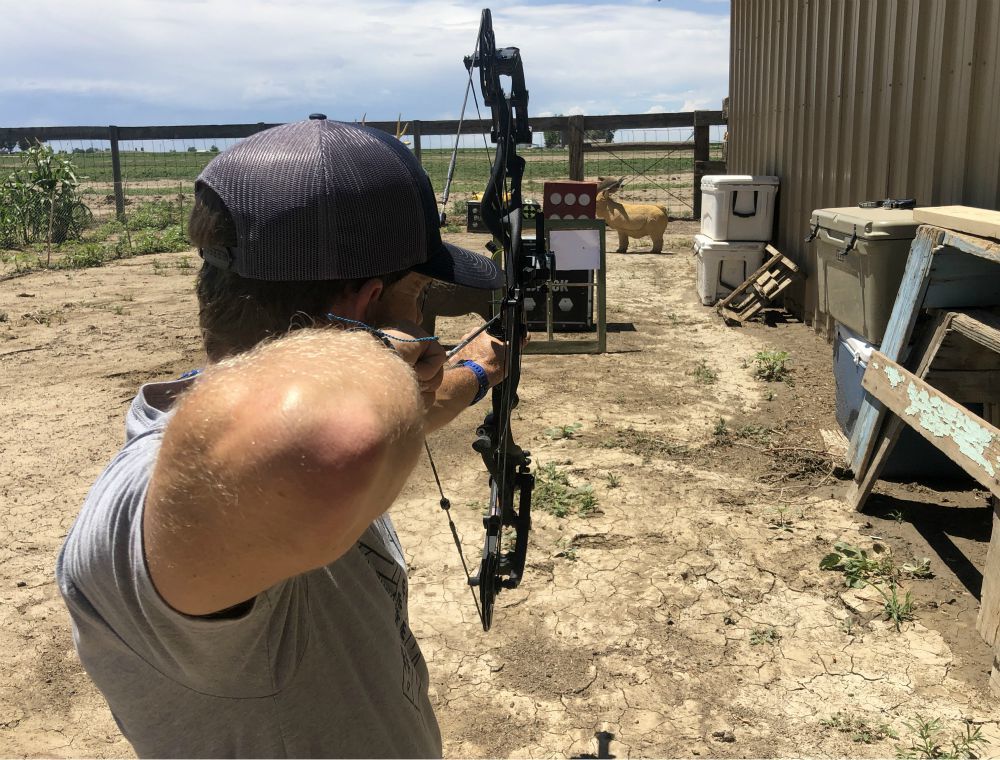
I started working on my own bow equipment 10 years ago. During that decade, I’ve become pretty proficient at my bow-tuning hacks, just like most of you. On that note, I go to YouTube often to learn more. Here are some of my favorite tips and links to each. Enjoy!
How-To Tie A D-Loop
This is where it all started for me. I wanted to learn how to tie my own D-loop. I was tired of having to make a three-hour drive and watch a pro shop professional tie a piece of cord onto my bow. The final straw was when my needed-to-be-replaced loop popped on a hunt. I was sending some carbon in camp before heading out for an evening elk hunt when … snap. Thank God my buddy Roy had some extra cord and could tie a loop.
This video (www.bit.ly/DLoop) is from 2009 and has almost 800K views. The video quality is reliable, and it takes you step-by-step through the D-loop process. The cameraman shows close-up shots of the loop being tied, and by pausing the video at each step, you can easily stay caught up.

Some advice: Tie lots of D-loops. Cut multiple cords and practice tying them up and down your bowstring. You don’t have to suck them down tight. Just learn the knots — one facing toward you and one facing away — down. Use the extra cords when the time comes for a replacement and toss a few in your hunting pack as well.
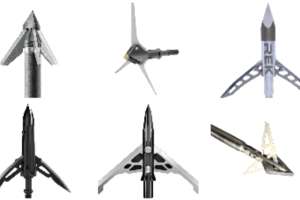
Proper Paper Tune
Shooting arrows through paper is an essential step. Don’t let anyone tell you otherwise. With that noted, it can be a frustrating process. You’re getting a consistent right tear, but aren’t sure how to remedy that tear, and you don’t want to watch a video that makes you feel like you need a Harvard degree to clean it up. Don’t fret. Watch the man, John Dudley, make sense of paper tuning at www.bit.ly/PaperTuning.
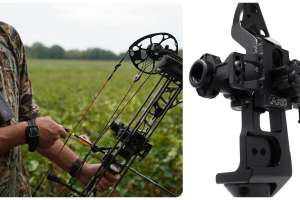
Drop-Away Rest Tuning
Threading the arm of that new drop-away into the Berger hole wasn’t much of a chore. Or, perhaps, you have a new Mathews or Hoyt and opted to go with QAD’s mount-to-the-face-of-the-riser Integrate MX. There’s not much easier than mounting this system to the slits in the riser. Ibuprofen tends to come out during the timing process. While there are multiple ways to time a rest, this video (www.bit.ly/SettingQAD) shows a tried-and-true method anyone can use, and it’s less than two-minutes long.
What I like about the method mentioned above is that it takes all the guesswork out of the equation. You’re actively shooting and letting the bow time the rest cord for you.
Lots of today’s drop-away rest have timing marks. One of my favorite techniques is to have a spouse or friend stand on the timing-marked side of the rest while I bring the bow to full draw. The timing marks should line up just as the cams roll over moments before the stops engage the string or the cable. Keep this technique in mind, as well.
Nocking Points
Nocking points have always been popular with those that chase podium finishes. They are growing in popularity with the bowhunting crowd, too. I love them. Why? Two reasons. First, they allow me to achieve perfect knock-to-string tension. When it comes to knock tension, you want about half-a-millimeter of space between your nocking points and the top and bottom of the arrow nock. Get too much tension, and the arrow will actually lift off the rest during the draw cycle. Too little tension allows for unwanted nock movement and slop on the string. Secondly, I can remove my D-loop and tie on another and put that loop back in the exact location. Similar to the video tips above, there are throngs of ways to tie in nocking points. This pair of links are my favorites, though: www.bit.ly/NockSets and www.bit.ly/EasyNocks.
Peep Sight Setting and Tie-In
Before you can worry about getting that peep in the right location on the string, you first need to install it. Warning: Today’s bowstrings are made to exact specs and are holding a bow capable of insane speeds together. Don’t use a dull butter knife or any peep-inserting tool. These devices, when placed in a string that is not pressed, will damage strands. Press the bow and follow these tips to achieve proper peep-sight placement in the bowstring: www.bit.ly/PeepSight.
Top archers around the globe agree that getting your peep sight set perfectly is a staple of consistent accuracy. One of the biggest mistakes I see shooters make is tying in their peep too early. The pressure of the bowstring on the grooves of the peep is typically enough to keep it in place. I’ve shot hundreds of arrows with not-tied-in peeps.
Take your time. Set your feels-right peep height, mark it with a Sharpie on your string and spend time shooting. Shoot at uphill and downhill angles. Shoot from a treestand and out of a ground blind. Shoot in low light and bright sunshine. You will likely find you need to adjust, even a millimeter or two up or down, during this process. You may also start getting some peep rotation, which simply requires pressing the bow and twisting the string in small .25-inch twists. See www.bit.ly/TwistedPeep for more reliable info.
Once you’re sure of your peep height and have it coming back just the way you want it, make sure it’s still in line with your Sharpie marks and tie it in. Again, there are countless ways to do this, but when it comes to proper peep tie-in, I like the advice from World Champion archer Levi Morgan. Check out his tie-in process at www.bit.ly/TyingPeep.

Proper Draw Length
Few things will help accuracy like proper draw length. While most of today’s bows come with adjustable-in-half-inch increment to draw-length settings, you may find the measurement not to be perfect. No biggie. Make it perfect.
The truth is, you can add a little draw length or decrease a little draw length by pressing your bow and doing some string and cable twisting. My draw length, for instance, is 28.75 inches. There is no setting on my bow for this, so I simply manipulate it.
To add a little length to your draw, add twists to your cables. To decrease your draw, add twists to your string. As you’ll see in this video (www.bit.ly/DrawLength), you will always want to add twists to the string or the cables. Removing twists can loosen areas where bow serving is present.

Proper Draw Weight
This one may sound elementary, and it really is, but I’m surprised how many archers I see trying to pull too much poundage. This is a recipe for injury and loss of shooting joy. In addition, those trying to pull too much poundage create unnecessary movement that is easily picked off by game animals. If you can’t hold your bow out in front of you with a slight bend in the elbow and draw the string straight back, you’re pulling too much poundage. If you have to point the bow down at the ground or up in the air to get the bow to full draw, you need to backout the limbs a turn or two.
Before you start turning bolts, measure your current draw weight with a digital scale. Be sure when adjusting weight that you back out each tiller bolt equally. The best way to ensure this is to make a top turn and then immediately make a bottom turn. Turn one limb setting more than the other, and you’ll change the position of a cam, which will significantly affect your accuracy. Be sure to read manufacturer guidelines before you make draw weight adjustments to any bow. When you’re ready, this video (www.bit.ly/Poundage) is a great one.
You don’t have to pull 70 and 80 pounds to kill big game critters. A female friend of mine killed a Shiras moose this past year at 42 yards pulling just 50 pounds of draw weight. You want the draw cycle to be comfortable.
Final Thoughts
The videos mentioned above are tips and tactics that work well for the individuals who made them. You may find, as I have over the years, that a specific method works better for you. You can also create your own method. That’s what it’s all about. YouTube should be used as a guide to help remedy problems, get a proper tune and the list goes on. It’s not gospel. If you find a technique you love, and it works for you, stick with it, and if you’re so inclined, make a video to share with all of us.